
Getting started
HarborClient is a desktop workbench for building, sending, and inspecting HTTP requests.
You do not need Node.js, pnpm, or any other development tools. Download the installer for your operating system, install HarborClient, and launch the app.
Your collections and requests are saved locally on your machine.
In this guide: You will send a request, inspect the response, change the request, and save it to a collection.
Before you begin
Make sure HarborClient is installed and open.
- Download HarborClient
- No account is required.
- HarborClient is available for macOS, Windows, and Linux.
If you already have API requests or collections, see Import existing work.
1. Create a request
Open a new request tab in HarborClient.
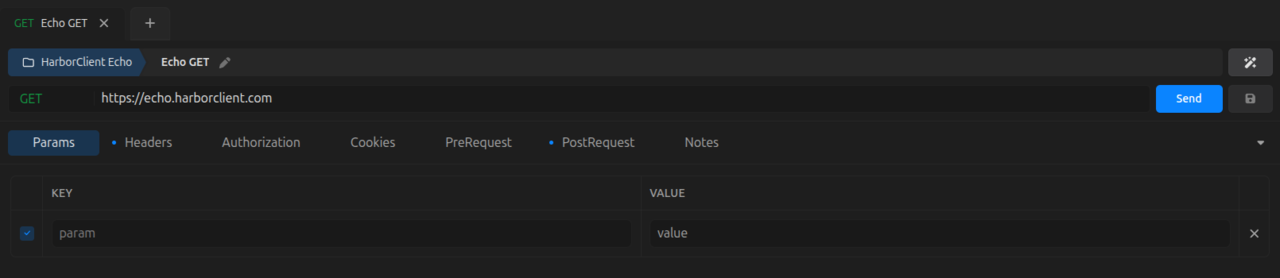
Choose GET as the request method, then enter:
https://echo.harborclient.comSelect Send.
HarborClient sends the request and opens the response viewer beneath the request editor.
2. Inspect the response
The response viewer shows what came back from the server.
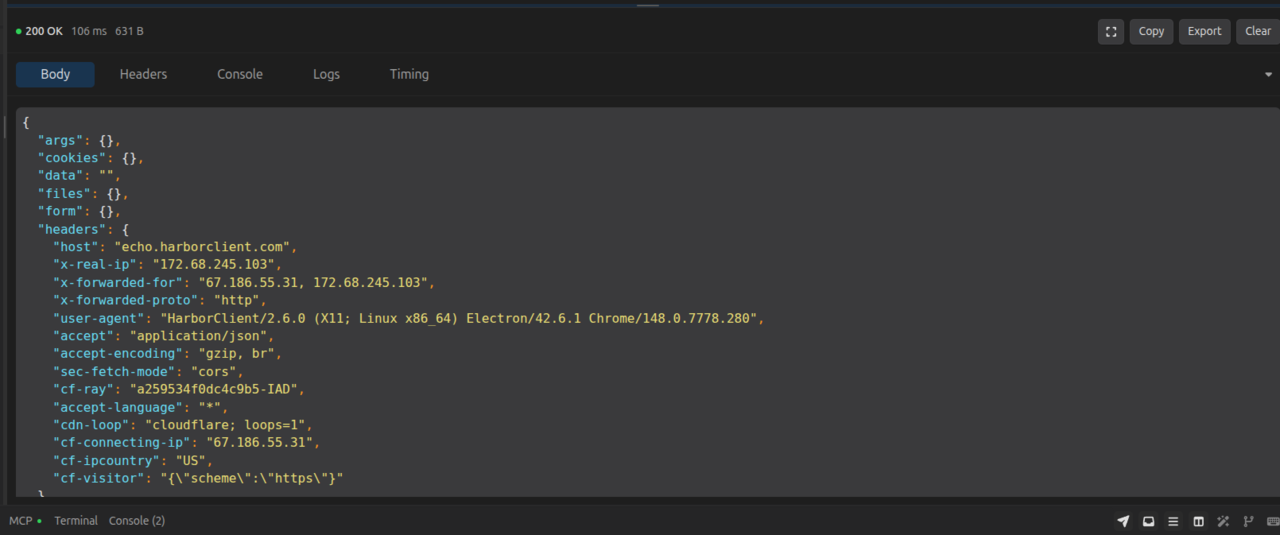
Start with these details:
- Status — whether the request succeeded
- Time — how long the response took
- Size — how much data was returned
- Headers — metadata returned by the server
- Body — the response content
When the body contains JSON, HarborClient formats it to make the structure easier to inspect.
First request complete: You have now built, sent, and inspected an HTTP request.
Learn more about the request editor and response viewer in Making requests.
3. Change the request
A useful API client should make it easy to compare what you intended with what was actually sent.
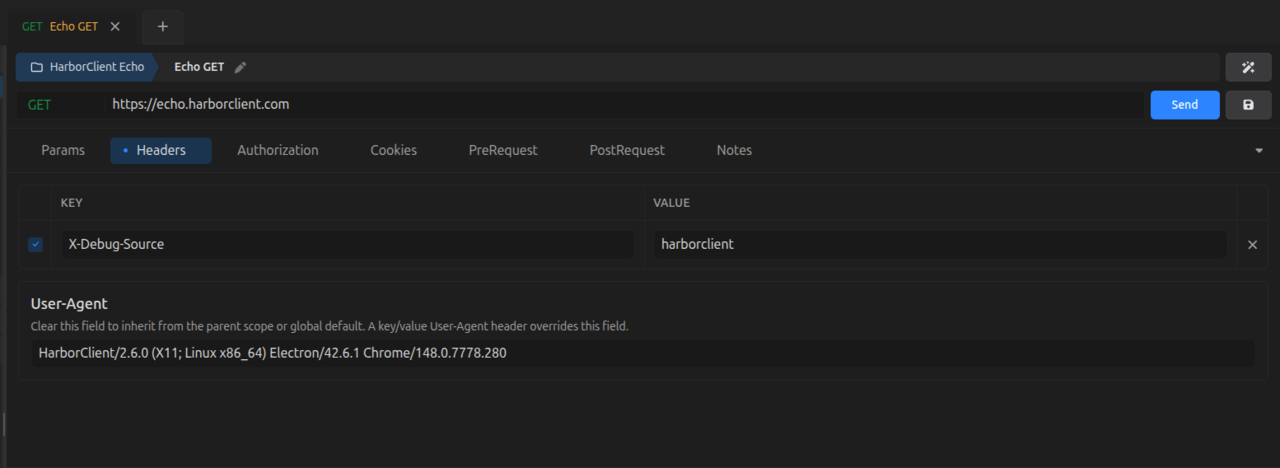
Open the request's Headers section and add:
| Header | Value |
|---|---|
X-Debug-Source | harborclient |
Send the request again.
Look through the echoed request data and confirm that the new header was included.
You can also use the request editor to configure:
- Query parameters
- Request headers
- Authentication
- Cookies
- Request bodies
- Pre-request and post-request scripts
Change one part of the request at a time and send it again to see how the result changes.
4. Save the request
Save the request so you can return to it later.
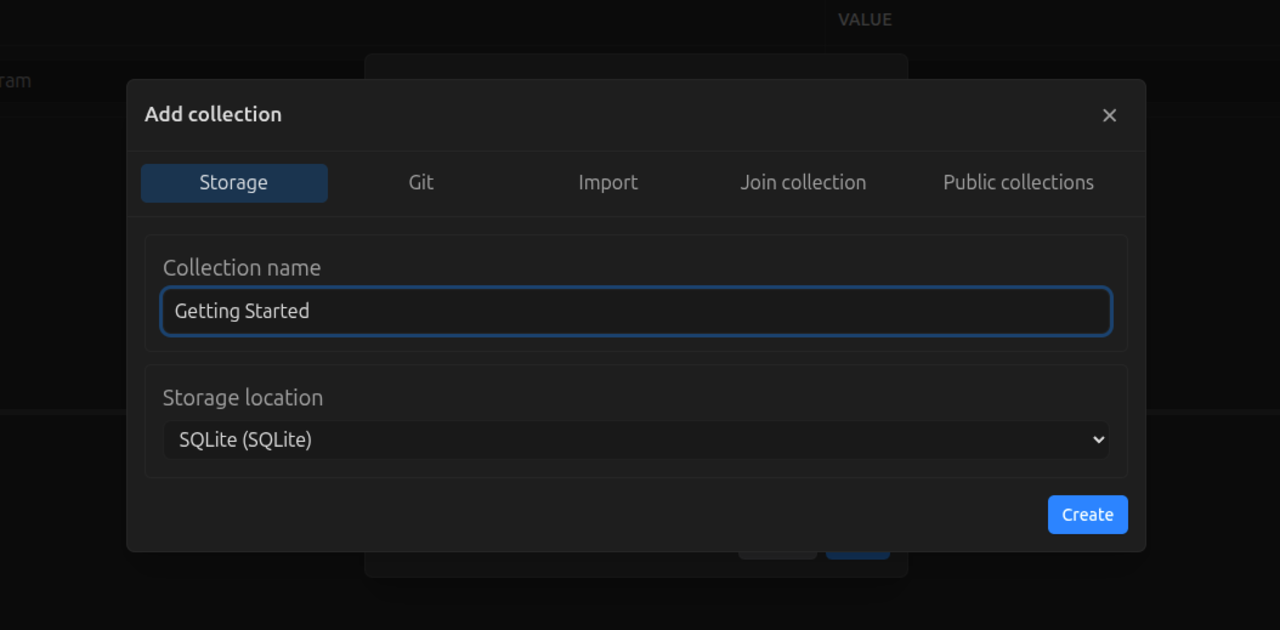
If the request does not belong to a collection yet, HarborClient will ask you to select an existing collection or create a new one.
Create a collection named:
Getting StartedThen save the request as:
Echo requestThe request will appear inside the collection in the sidebar.
Collections help you organize related requests and share configuration such as variables, headers, authorization, and scripts.
Learn more in Collections.
5. Use a variable
Variables let the same request work with different hosts or configurations without duplicating it.
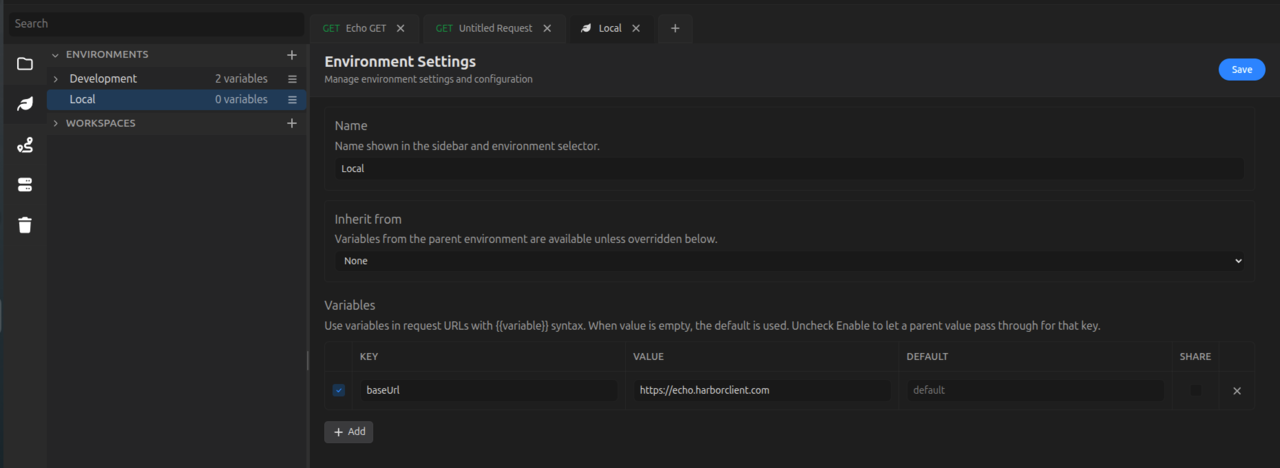
Create an environment named:
LocalAdd a variable named baseUrl with this value:
https://echo.harborclient.comActivate the environment, then change the request URL to:
{{baseUrl}}
Send the request again.
HarborClient resolves the variable before sending the request.
A common project might use separate environments for:
- Local development
- Staging
- Production
Each environment can define a different value for baseUrl, tokens, account identifiers, or other reusable configuration.
Learn more in Environments.
Import existing work
You do not need to rebuild every request when moving to HarborClient.
Use HarborClient's import options to bring existing API definitions and collections into the workbench. After importing, review variables, authentication, request bodies, and scripts before using the collection against a live service.
See Collections for supported import workflows and collection management.
Find commands and pages quickly
The Action menu provides global navigation and access to common actions.
Use it to find:
- Requests and collections
- Environments
- Settings
- Plugins
- Themes
- Snippets
- Built-in actions
See Action menu for the available commands and navigation options.
You can also use Search to find items in the sidebar, settings, and marketplace.
Where to go next
Debug an API
- Making requests — configure and inspect HTTP requests.
- Features — explore the request builder, tabs, and response viewer.
- Request scripts — set variables, transform requests, and write tests.
Organize a project
- Collections — group requests and share configuration.
- Environments — switch variables between local, staging, and production.
- Storage — choose where HarborClient stores project data.
Customize the workbench
- Settings — configure appearance, behavior, and storage connections.
- Action menu — navigate and run actions from one place.
- Search — find requests, settings, plugins, themes, and snippets.
Work with a team
- Team hubs — connect to HarborClient Team Hub for shared collections.
- Storage — review storage and collaboration options.
Troubleshooting
HarborClient does not open
Review the platform-specific instructions on the download page.
A request works in the browser but fails in HarborClient
Compare the following:
- Request URL
- Authentication
- Cookies
- Headers
- Redirects
- Request body
- Environment variables
The browser may be sending credentials, cookies, or headers that are not present in the HarborClient request.
A variable is not being replaced
Confirm that:
- The variable exists in the active environment or collection.
- The variable name matches exactly.
- The correct environment is active.
- The value uses the
{{variableName}}format.
See Environments for complete variable behavior.
You need more diagnostic information
HarborClient can write diagnostic information to a rotating log file.
Configure Log file path in Settings → General. See Settings — Diagnostic log file for file rotation and browsing behavior.